Multi-Factor Authentication
You can request that your users enable multi-factor authentication. Multi-factor authentication is only available for accounts using direct login. If your institution is using SSO, you are responsible for administring multi-factor authentication.
Multi-factor authentication is when a user logs into the SFS and a second method of verification is requested by Flywire. A user who has enabled multi-factor authentication will be required to enter a code after they enter their username and password.
New users must create a password and verify their email address before they can enable multi-factor authentication.
Multiple Authentication Methods
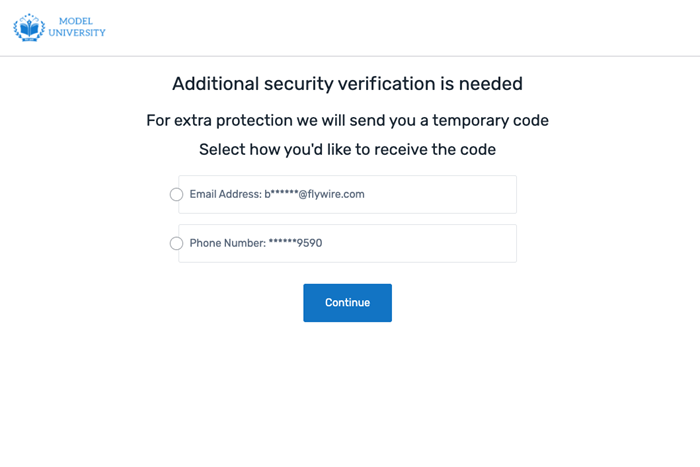
You can have more than one authentication method enabled for your account. If you enable multiple authentication methods, you can select how we send the code.
Walkthrough: Enabling Multi-Factor Authentication
-
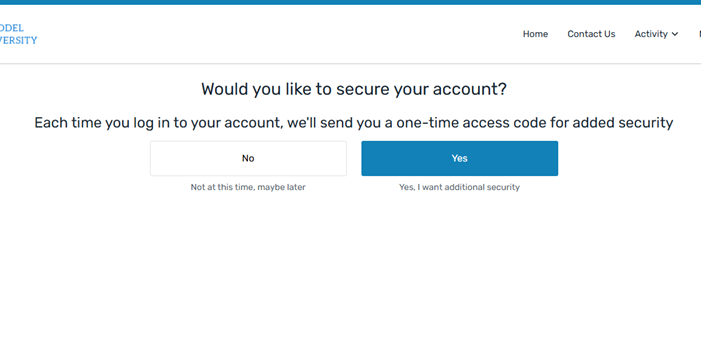
On the Would you like to secure your account? page , click Yes to enable multi-factor authentication.
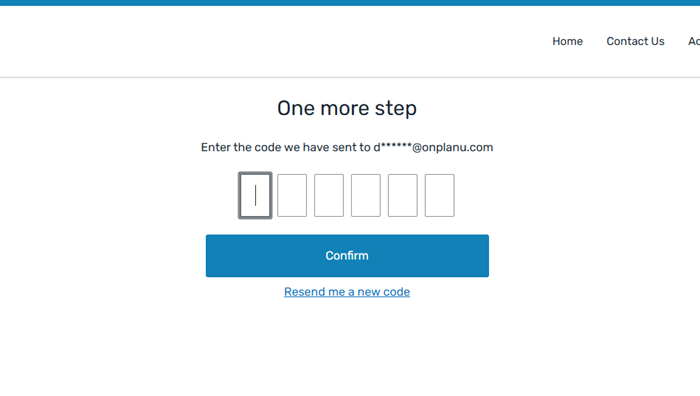
The SFS sends you an email with your 6-digit code and the One more step page appears.
-
Enter the code and click Confirm.
The Account Summary tab displays with a Success! Extra security has been enabled banner.
Multi-factor authentication is now enabled.
The next time a user logs in they will have the option to select the Remember Device for 30 days checkbox, which allows them to log in on this device for 30 days without having to use an email code.
Walkthrough: Changing a User's Multi-Factor Authentication Method
-
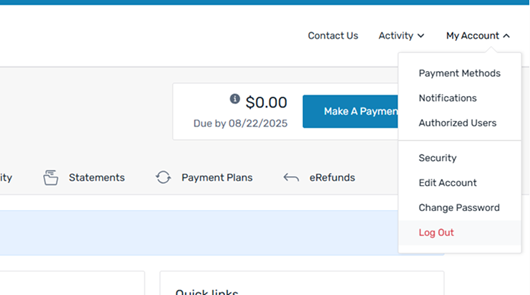
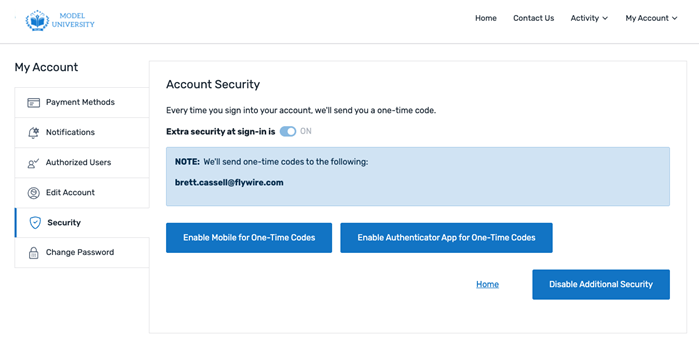
Select the My Account menu and click Security.
The Account Security tab appears.
-
You can change your multi-factor authentication method:
-
Click the Enable Mobile for One-Time Codes button to send the security code as an SMS message.
-
Click the Enable Authenticator App for One-Time Codes button to send the security codes using an authenticator app.
-
Click the Disable Additional Security button to disable a multi-factor authentication method for your account.
The SFS sends you a 6-digit code and the One more step page appears.
-
-
Enter the security code to enable your authentication method.
The Account Summary tab displays with a Success! Extra security has been enabled banner.
The multi-factor authentication method is now enabled.
The next time a user logs in they will have the option to select the Remember Device for 30 days checkbox, which allows them to log in on this device for 30 days without having to use an email code.
Walkthrough: Disabling Multi-Factor Authentication
-
Select the My Account menu and click Security.
The Account Security tab appears.
-
Click the Disable Additional Security button to disable a multi-factor authentication method for your account.
-
Click the toggle to select which authentication types to remove. You can disable one or all authentication methods for your account.
The next time a user logs into their account after multi-factor authentication is disabled, the Would you like to secure your account? page opens and the user is prompted to enable multi-factor authentication again.
