Term Setup Wizard
The Term Setup Wizard allows you to create and approve the upcoming academic terms directly in the SFS. The Term Setup Wizard is available from the Billing and Payments Dashboard page.
The term setup wizard will help you roll term setup forward a year. It is a joint effort between you and Flywire support that is conducted fully within the SFS system. At the start, you will be prompted with data based on the corresponding term in the prior year. You can update dates and certain key values directly and request additional changes. Flywire Support will review the term dates, work with you to make any necessary adjustments, and send you the configuration for final approval.
The process must be completed for each term. If you use cohorts, the process will be completed separately for each cohort.
A cohort is an SFS feature that allows you to create sub-groups in an institution. These sub-groups can have different academic term dates, payment plan configurations, and due dates.
For example, if your institution has an undergraduate school and a graduate (postgraduate) school, you can create separate cohorts for each school. This allows you to configure undergraduate and graduate students with different payment plans and due dates.
Process and Timeline
|
Timing |
Step |
Process |
|---|---|---|
|
At least 90 days before offers are expected to be available according to your calendar |
Term Setup is Ready |
Flywire will prompt you to provide new term information. Depending on your preferences, Flywire can prompt for one term at a time or for all terms in the academic year at the same time. |
|
No less than 60 days before offers will be available |
You Submit the Data |
You complete the term setup wizard and provide the proposed dates to Flywire. A support ticket is no longer required in the term setup wizard process. You can track the term setup status in the SFS. |
|
Within 10 business days of receiving the completed online form |
Flywire Reviews the Data |
Flywire support completes an initial review of your information. |
| After Flywire has reviewed the form | You Work with Flywire on the Changes |
If Flywire support has any questions about the changes, support will change the term setup status to Awaiting Response and Flywire Support will reach out via email for clarification. If you have follow-up questions or concerns you can reach out to Flywire Support during this conversation. |
|
Completed at least two weeks before offers are expected to be available |
School Sign-Off |
When Flywire support is ready for your final sign-off to approve the term setup, support will change the term setup status to Client Confirmation Needed. The SFS will send you an email notification and update the term status on the Billing and Payments Dashboard page. This is the final version and all changes should be reflected in the data. You can approve or reject the final setup in the SFS. The term will display as Upcoming until the proceeding term ends and the new term becomes the Current term. |
|
Before the start of the term (if needed) The offer communications file must be loaded before the "Offers Available" date |
School Sends File (if needed) |
You send a file of student data to create offer communications, to populate balances (batched based), or to identify student cohorts. If Flywire has not received the file, you will see a reminder on the Billing and Payments Dashboard page. |
|
When the term is Current or Upcoming and the Offer Available On date is current or past |
Offer Creation |
Payment plan offers for the term are created when you send a file or when students begin logging in. |
Step-By-Step Workflow
1. Term Setup is Ready
You will receive notifications from the SFS when the term setup is ready:
-
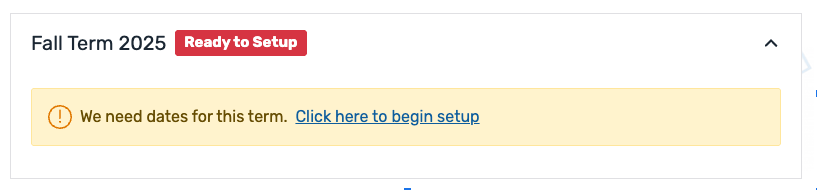
A prompt appears in the term box on the Billing and Payments Dashboard page.
-
A blue banner alert will display when you log in to the SFS.
-
You will receive an email notification with a reminder that the term is ready to be setup 90, 45, 30, and 15 days before the term setup is due.
After clicking the link to begin setup, you are taken to the term setup wizard.
You must have access to the Billing and Payments Dashboard page and the "Ability for a client to set up a new academic term" permission enabled to be able to use the term setup wizard.
At this time, only one user can complete the process and they must provide all dates and submit the information in one session.
2. Term Dates
On the Academic Term Information and Dates page, select the dates for the next term.
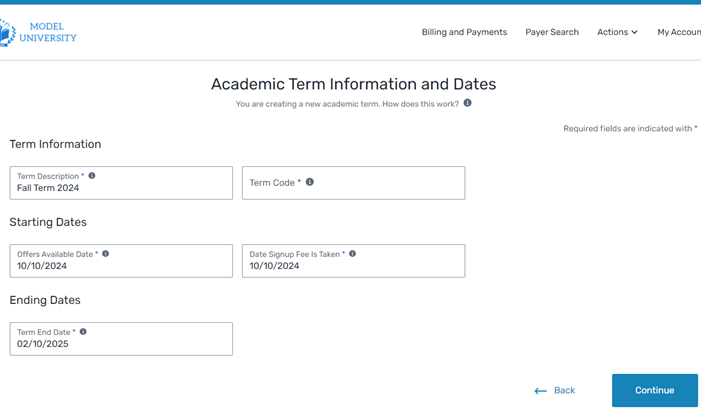
Pre-populated information
The dates and term description are incremented one year from the corresponding term in the prior year. Only dates that were populated in prior term are displayed for update.
3. Payment Plan Options
On the Payment Plan Offer Options page, select the payment plan offers. You can update the first payment date or the offer available date for all offers. Additional information about the offer option is displayed, such as the sign up fee, whether international payment plans are allowed, if CSR approval is required, and the offer expiration date.
If additional changes are requested, such as adding a new option or not rolling forward an offer option from a prior year, you should add that information in the Request Additional Changes section.
If you would like to include a hidden offer for the term, you can select the hidden offer prompt to add a hidden offer.
Hidden offers are shorter payment plans that are not automatically offered to the payer. They are configured during term setup and you can manually offer them to a payer.
For example, if a student has trouble paying the final installment of the payment plan, you can use the hidden offer to split their balance using the hidden plan.
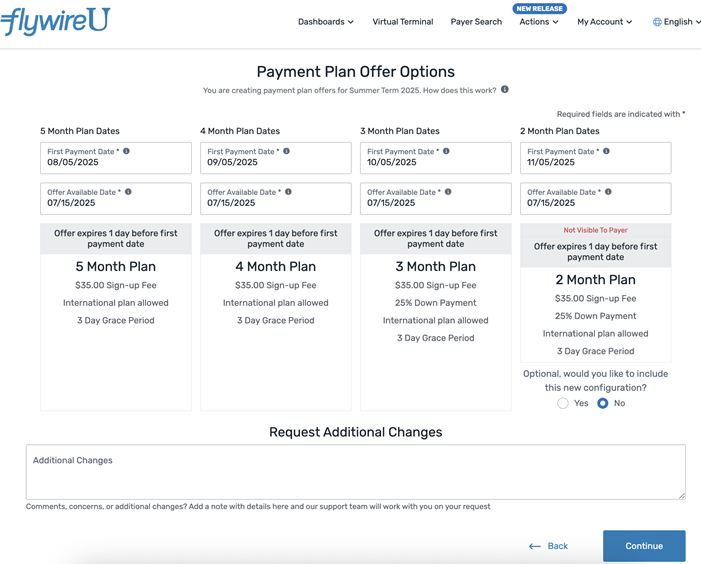
Pre-populated information
The payment plan offers are created from the corresponding term in the prior year.
4. Offer Communications
This page only displays if you had offer communications configured for the corresponding term in the prior year.
On the Payment Plan Offer Communication schedule page, review the dates the offer communications will be sent. You can update the dates for each option.
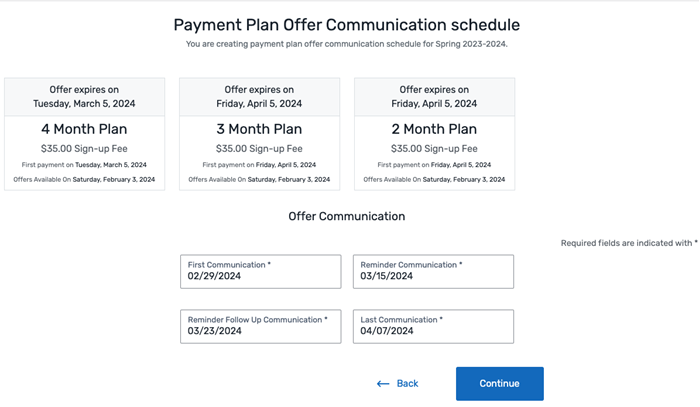
Pre-populated information
The offer communication dates are created from the corresponding term in the prior year.
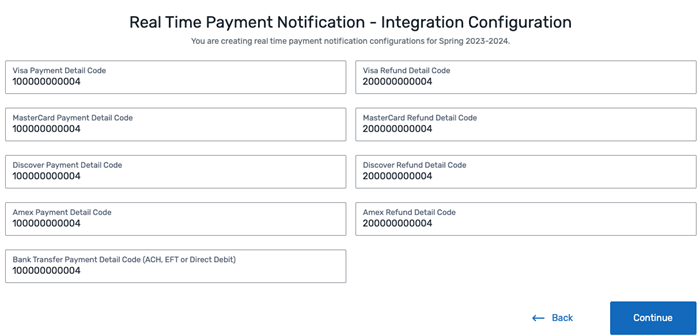
5. Real Time Payment Notification
This page only displays if you had term specific payment information configured for the corresponding term in the prior year.
On the Real Time Payment Notification - Integration Configuration page, review the payment notification codes.
6. Real Time Payment Plan
This page only displays if you had term specific payment plan details configured for the corresponding term in the prior year.
On the Real Time Payment Plan - Integration Configuration page, review the payment plan activation codes for real time integration.

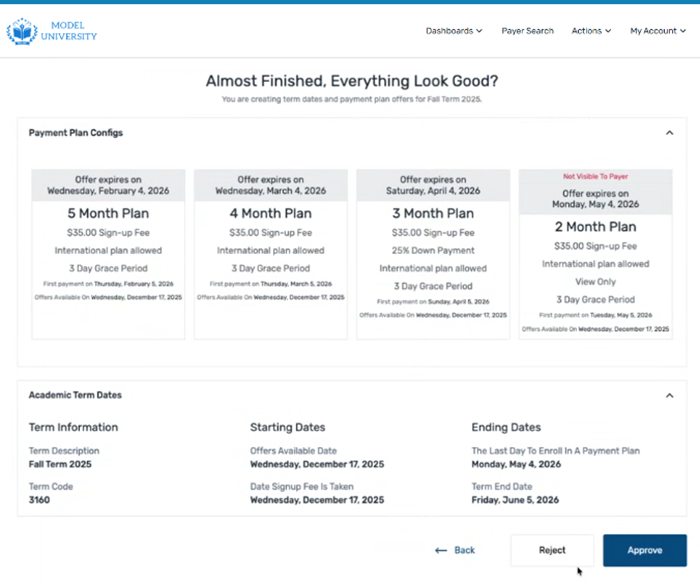
7. Confirmation
On the Almost Finished, Everything Look Good? page, review all the term setup information updated through the term wizard. Confirm the information you're submitting is correct.
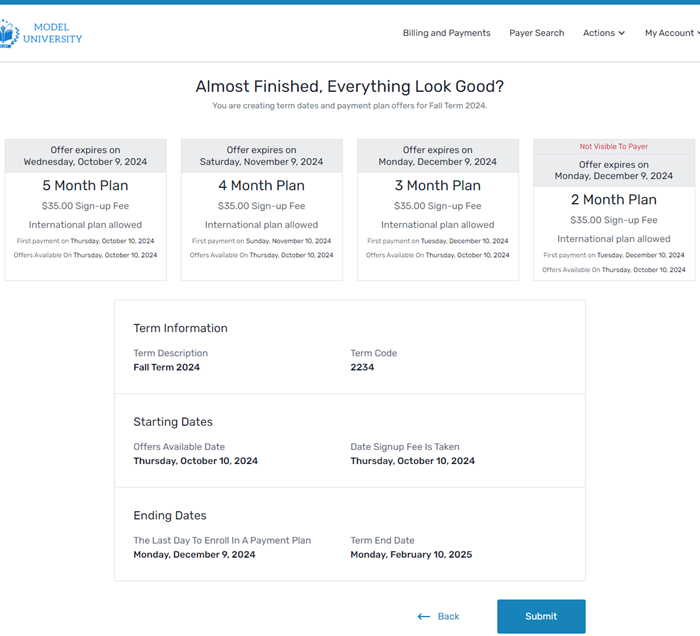
After you submit the data, the term setup will change to Pending Review.
8. Pending Review
Flywire Support will review the information submitted, make any necessary updates, and reach out to you with any follow up questions or concerns.
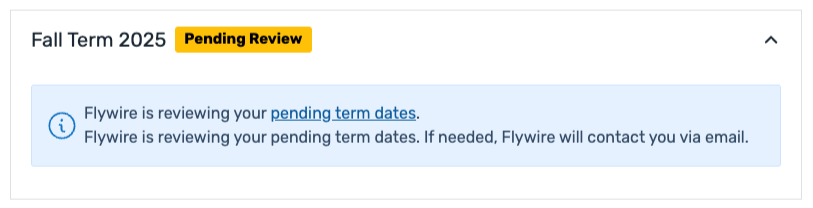
You can click on the 'pending term dates' link to see the information for the upcoming term. You can reach out to Flywire with any follow up questions or comments.
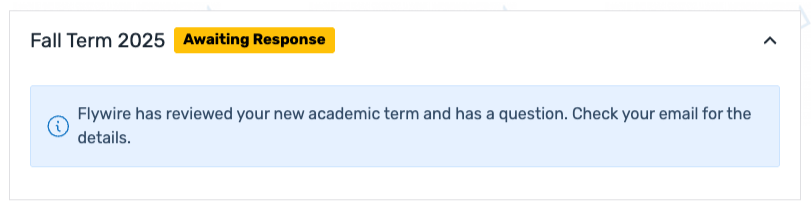
9. Awaiting Response
If Flywire Support has questions for you, they will update the term status to Awaiting Response and reach out via email for clarification. If you have follow-up questions or concerns you can send them to Flywire Support during this conversation.
10. Client Confirmation Needed and Term Setup Approval
When Flywire Support has completed a review of the upcoming term or finished completing planned changes, they will update the term status to Client Confirmation Needed.
The SFS will send you an email notification and the updated term status appears on the Billing and Payments Dashboard page.
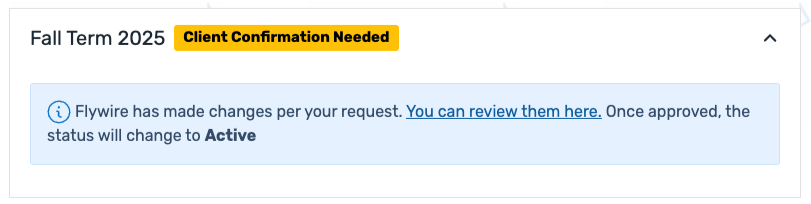
You can click on 'Your term dates' to review the information for the upcoming term.
Approve and Reject
Review the term setup information. When you are ready to sign off, click the Approve or Reject buttons.
If needed, you can add a comment in the Are You Sure pop-up.
-
If you approve the term setup, the term becomes Active and is updated to Upcoming or Current status.
-
If you reject the term setup, the term status returns to Pending Review and Flywire Support will address your comments.
11. Flywire Approves the Term Setup
When Flywire support completes the review of the term setup and has no further questions, they will activate the term. When this happens, the SFS will send you an email notification and the term will appear as Upcoming or Current status on the Billing and Payments Dashboard page.
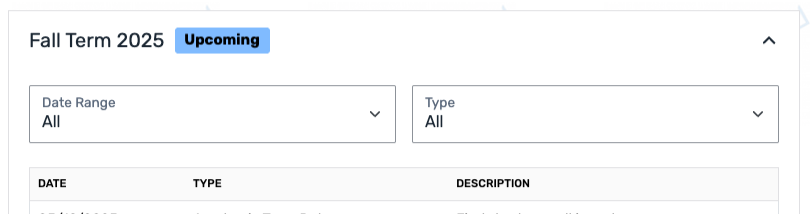
12. Upcoming
Once the term is active, it displays as Upcoming while it is still in the future.
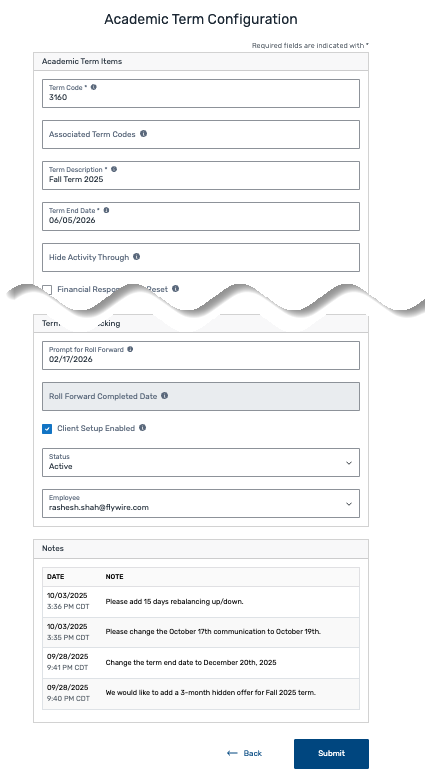
You can view the final setup and Notes from the term setup wizard by clicking the Academic Term Setup link at the bottom of the term box.
On the Academic Term Configuration page, you can view the configuration and notes from the completed term setup wizard process.
Term Status
A term can be in the following statuses:
|
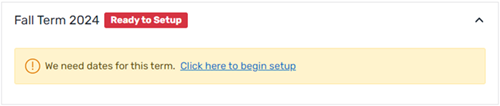
Ready to Setup |
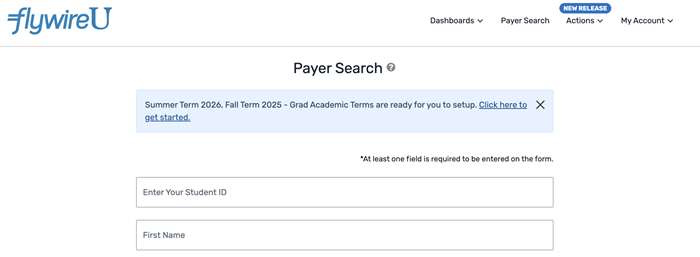
The Ready to Setup status indicates the term is ready to be configured with term dates and offer configuration. When the term is in this status, you can click the 'Click here to begin setup' link or the 'Click here to get started' link to open the term setup wizard.
|
|
Pending Review |
The Pending Review status indicates that you have submitted the term data. Flywire Support will review the information submitted and make any necessary updates. You will see the Pending Review status indicator on the Billing and Payments Dashboard page. You can also reach out to Flywire Support with any follow up questions or comments.
You can click on the 'pending term dates' link to see the information for the upcoming term. |
|
Awaiting Response |
The Awaiting Response status indicates that Flywire Support has questions and needs a response from you. You will see the Awaiting Response status indicator on the Billing and Payments Dashboard page, in a smart alert banner, and receive an email notification from the SFS.
|
|
Client Confirmation Needed |
The Client Confirmation Needed status indicates that Flywire Support has made the changes you requested and needs you to confirm that the changes are correct. You will see the Client Confirmation Needed status indicator on the Billing and Payments Dashboard page, in a smart alert banner, and receive an email notification from the SFS.
After you open the term setup, you will see Approve and Reject buttons. You can review the changes and approve or reject the setup. |
|
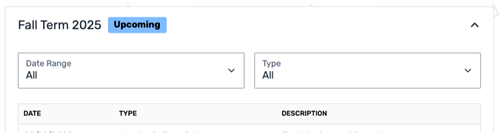
Upcoming |
The Upcoming status indicates that the final term dates are approved and the term start dates are in the future.
An upcoming term becomes the current term the day after the end date of the prior current term. If Flywire needs a file from you, you will see a file warning on an Upcoming term.
|
|
Current |
The Current status indicates that the SFS considers this term to be the primary active term. You will see the Current status indicator on the Billing and Payments Dashboard page.
A term is considered Current when the following criteria is met:
|
|
Past |
The Past status indicates that the term end date is in the past. This is also known as a prior term. You will see the Past status indicator on the Billing and Payments Dashboard page. Any term that is not listed on the Academic Term Configuration page is considered to be a prior term by the SFS. |


Roles and Responsibilities
Client responsibilities
-
Submit the term data in a timely fashion
-
Answer any question from the Flywire Support team
-
Confirm and approve the term information in the SFS
-
Send a payer account load file in a timely fashion (if used) in order to create payment plan offers and offer communications
Flywire responsibilities
-
Prompt you to begin the process
-
Support any questions or concerns from you
-
Review term data in a timely fashion after it has been submitted by you
-
Manage any new or updated configuration
-
Ask you to confirm and approve the data in the SFS
-
Activate the term (optional)
FAQs
If additional changes are requested, such as adding a new option or not rolling forward an offer option from a prior year, you should add that information in the Request Additional Changes section.
If additional changes are requested, such as adding a new option or not rolling forward an offer option from a prior year, you should add that information in the Request Additional Changes section.
You will receive an email notification with a reminder that the term is ready to be setup 90, 45, 30, and 15 days before the term setup is due.
