Walkthrough: Setting Up A New Authorized User
An Authorized User can create a new SFS account and request access to a student's account.
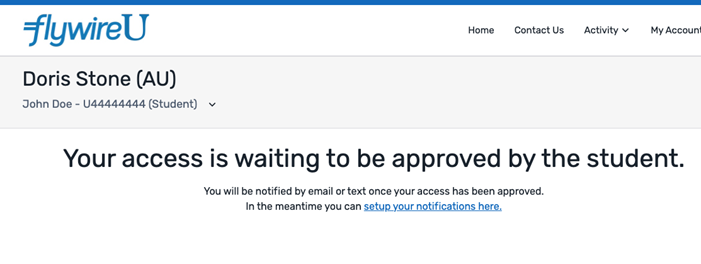
The student will need to grant the authorized user access before the Authorized User can view any student account information.
An Authorized User is an individual that a student has allowed to access their account. An Authorized User can be any person, such as a parent, grandparent, spouse or employer. There is no limit to the number of Authorized Users a student can add to their account.
When a student grants the Authorized User access, they will have access to financial details and personal information in the student's account. Giving a person authorized user access means the student has agreed to release private information that is protected by laws such as the United States (US) Department of Education Family Education Rights and Privacy Act (FERPA).
When the Authorized User is granted access, they can perform the same actions as a student - including view the account balance, make payments, and view account activity.
The SFS can notify students about their rights under the Family Educational Rights and Privacy Act (FERPA). FERPA is a federal law that protects the privacy of student education records. When a student creates an Authorized User or allows an Authorized User access to their account, they acknowledge that protected information will be shared with the Authorized User.
For more information about:
-
Authorized Users in the SFS.
-
How an Authorized User adds a student to an existing account.
-
On the Flywire homepage, click the Create New Account link.

-
Click the Authorized User button to indicate you are creating an Authorized User account.
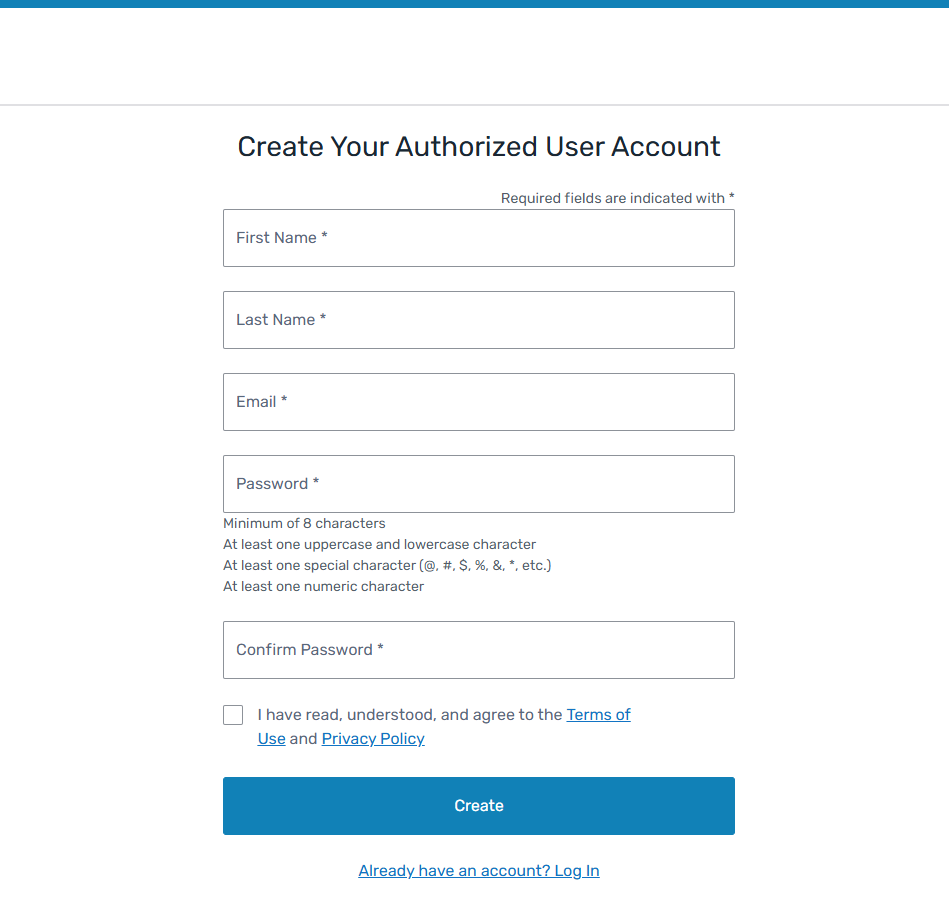
The Create Your Authorized User Account page displays.
-
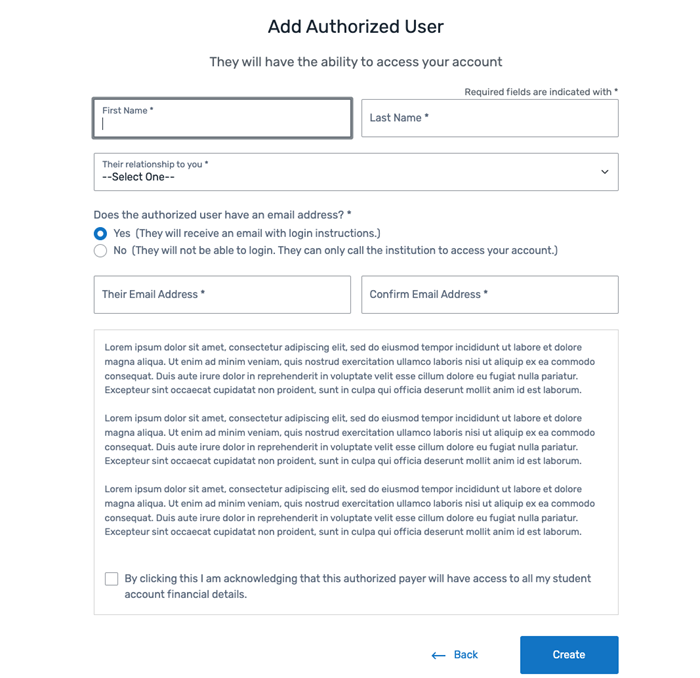
Enter the Authorized User's information.
-
Select the check box to attest you agree to the FlywireTerms of Use and Privacy Policy.
 What are the terms of use and privacy policy?
A payer agrees to the Terms of Use and Privacy Policy when they use Flywire to send and receive payments.
Payer Terms of Use
The Payer Terms of Use inform the payer about the rules and guidelines.
Privacy Policy
The Flywire Privacy Policy informs the payer about the information Flywire collects and the choices the payer can make about the handling of their information.
-
Click Create to add the Authorized User account.
Flywire sends an email notification to your email address to verify and activate your account.
-
In the email, click the Verify Email button.
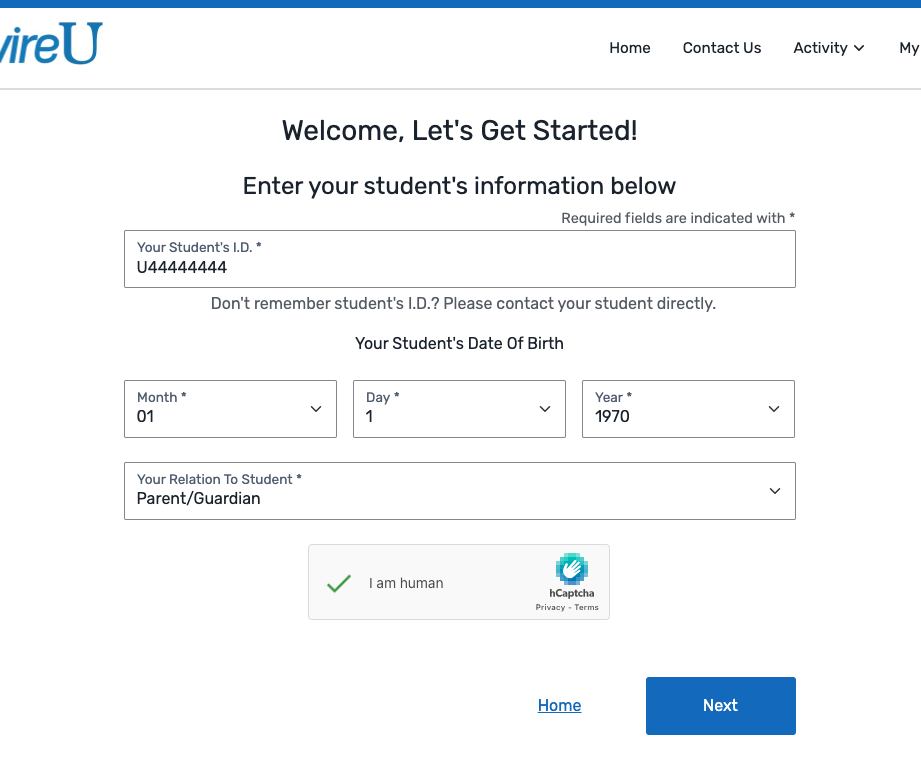
The Welcome, Let's Get Started! page displays.
-
Enter the student's information.
-
Click Next.
Flywire sends a notification to the student. The student must approve your access to their account.
On the page
Create Your Authorized User Account page
|
|
Welcome, Let's Get Started! page
|
|
